Crafting the perfect eyebrow in permanent makeup isn't just about technical skill; it's an art that requires a PMU artist to master both the "psychological" approach and aesthetic insight. An artist must do more than select the right shape; they must refine the brow to enhance and harmonize with the client’s natural features, taking into account their personality and style.
This delicate balance between a professional's knowledge and a client's desires is at the heart of PMU artistry. The final design should not only be in line with the artist's expertise but should also reflect the client's individuality. The true success of the procedure lies in the artist's ability to marry these aspects into a tailored, client-specific look that resonates with their sense of self.
Assessment
When designing eyebrow sketches for clients, it’s important to base the design on their individual face and eye shape. Each client has an ideal eyebrow arch, length, and thickness that will best highlight their features and achieve a harmonious appearance.
The first step for PMU artists is to assess the client’s face shape. This assessment will guide the design process, helping to determine the optimal eyebrow shape with consideration for the most flattering width, height, and length.

Eyebrow Mapping
The next phase involves meticulously planning the brow architecture. This is a critical and precise part of the process, with a focus on achieving symmetry for a natural, balanced look.
PMU artists should always strive for a natural and authentic eyebrow appearance. The design should enhance the client's features without being too prominent or distracting. If the eyebrows complement the client’s face subtly and harmoniously, the design is considered a success.
The eyebrow is conventionally divided into three parts:
- The start point of the brow: Mapping begins with this part. It is done by drawing a line parallel to the nose that passes through the inner corner of the eye.
- The arch of the brow: The placement of this point depends on the eye set. For wide-set eyes, the line should be drawn from the nostril through the pupil. For close-set eyes, the line should go through the iris.
- The tail of the brow (end point): This is marked by drawing a straight line from the nostril, passing through the outer corner of the eye.
Once all the points are determined, they are connected to create the eyebrow shape. It is crucial to maintain the parallelism of the lines and the proportions. The lines of the brow's body should be straight.
TIP: When sketching the shape, keep in mind that the tail of the brow should be shorter than the body (approximately one-third of the total length). Choose the right direction and length for it. An excessively "hooked" tail can make the look seem harsh and sullen, while a too-high tail can make the appearance seem absurd. When sketching the beginning of the brow, consider its direction. The start of the brow should not have harsh outlines (making it square, round, or oval is a big mistake), and it's also a mistake if the start of the brow is too high or too low relative to the tail.
Investing in Quality Tools
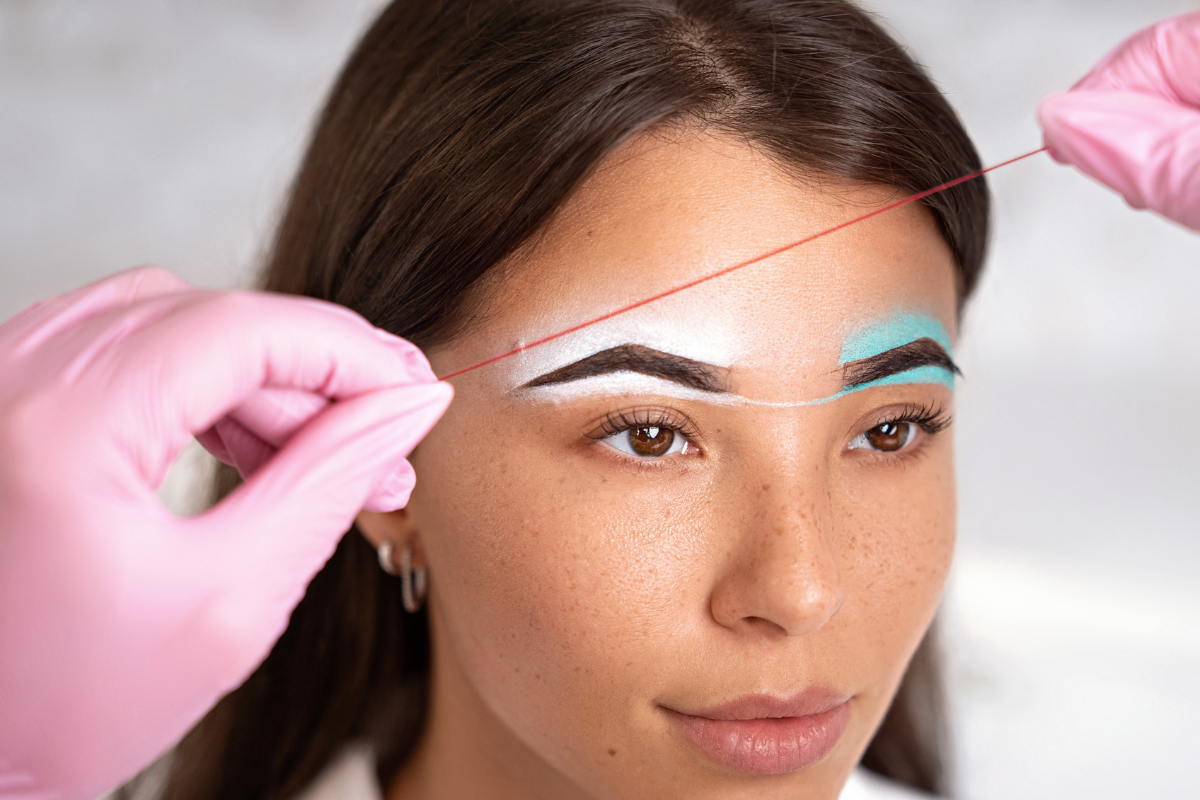
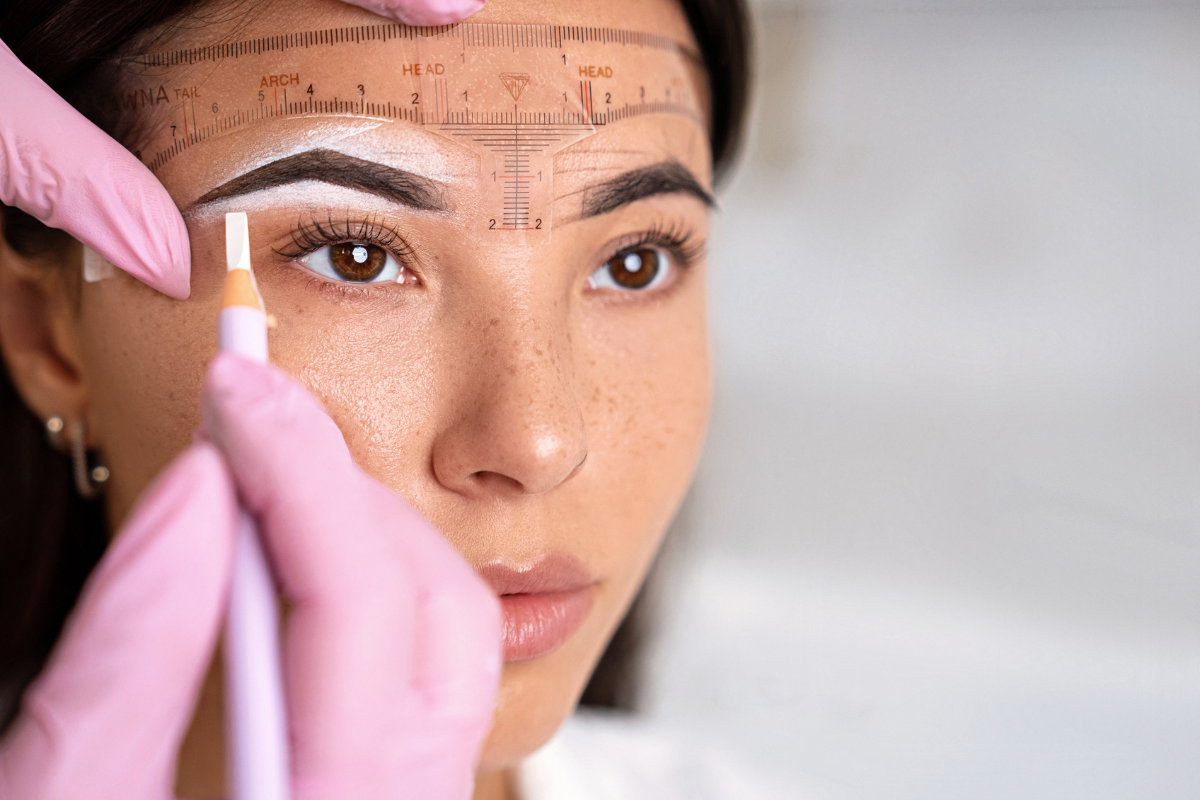
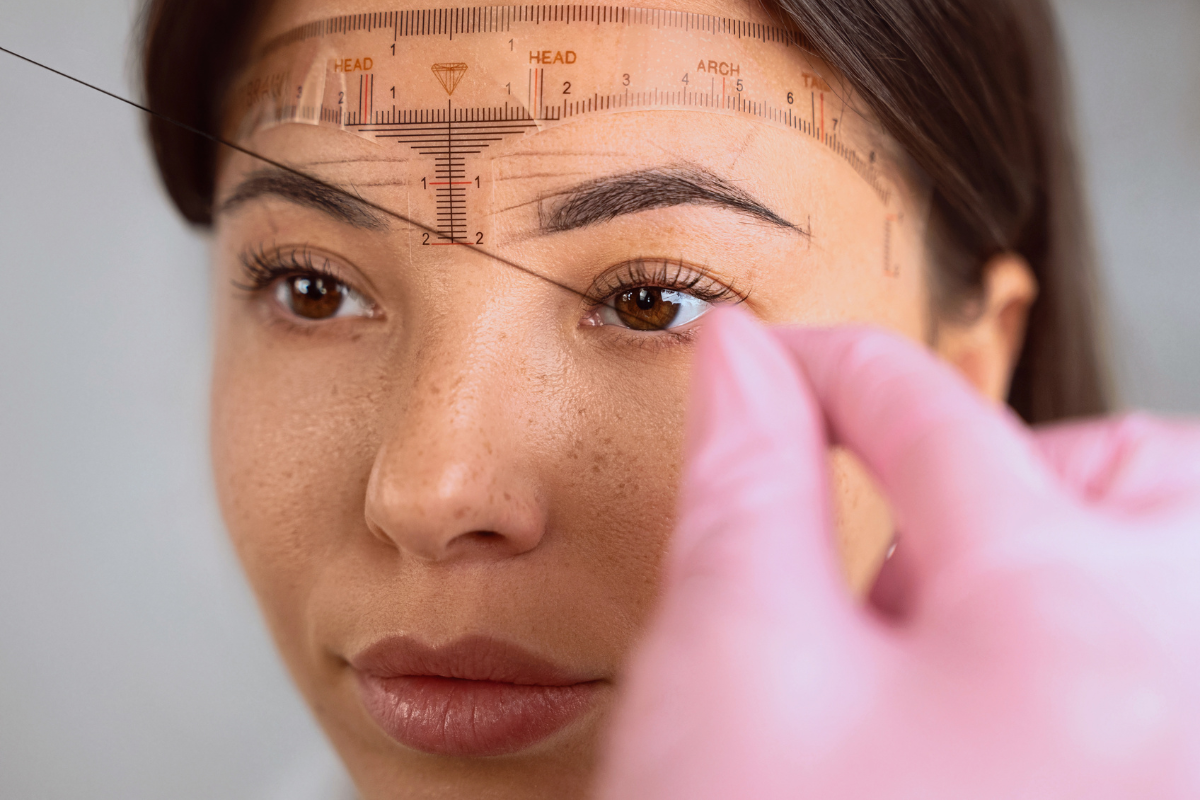
For PMU artists, the investment in quality tools is fundamental to achieving precision in eyebrow mapping. A disposable eyebrow sticky ruler and measuring caliper are indispensable for accurate measurements and ensuring symmetry. Additionally, for insuring symmetry and straight lines, it is handy to use mapping strings (available in pink, black, white, and turquoise colors).
The clarity of your initial outlines can be greatly improved with a high-visibility white pencil, which is essential for both ease of use and the ability to make corrections without leaving marks.
As clients need to preview their healed brows, employing a brown pencil that matches the expected healed color is critical. This step is crucial not only for accurate representation but also for enhancing client confidence in the final look.